Whether you’re a buyer looking to furnish your home with modern and pre-owned items, or a vendor aiming to sell your products with low commission, this step-by-step guide will walk you through every feature of the app.
What is the Nested.pk Mobile App?
The Nested.pk Mobile App is more than just a shopping platform — it’s a complete ecosystem for both buyers and sellers.
Key Features for Buyers
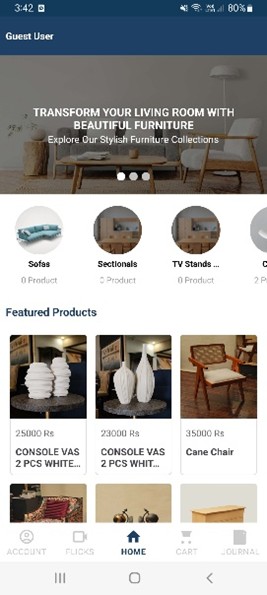
Browse thousands of new and pre-owned furniture listings.
Filter products by city (Lahore, Karachi, Islamabad, Faisalabad) for local purchases.
Communicate directly with vendors using in-app chat.
Quick checkout with secure payments.
Key Features for Vendors
No registration fees — sign up and start selling for free.
Fair commission (10–15%) only on sales — you earn more compared to traditional marketplaces.
Upload unlimited product listings with photos and videos.
👉 Requirements: Android 7.0+, stable internet, and at least 50 MB of free space.
1. How to Create an Account or Log In
Before you can shop or sell, you need an account
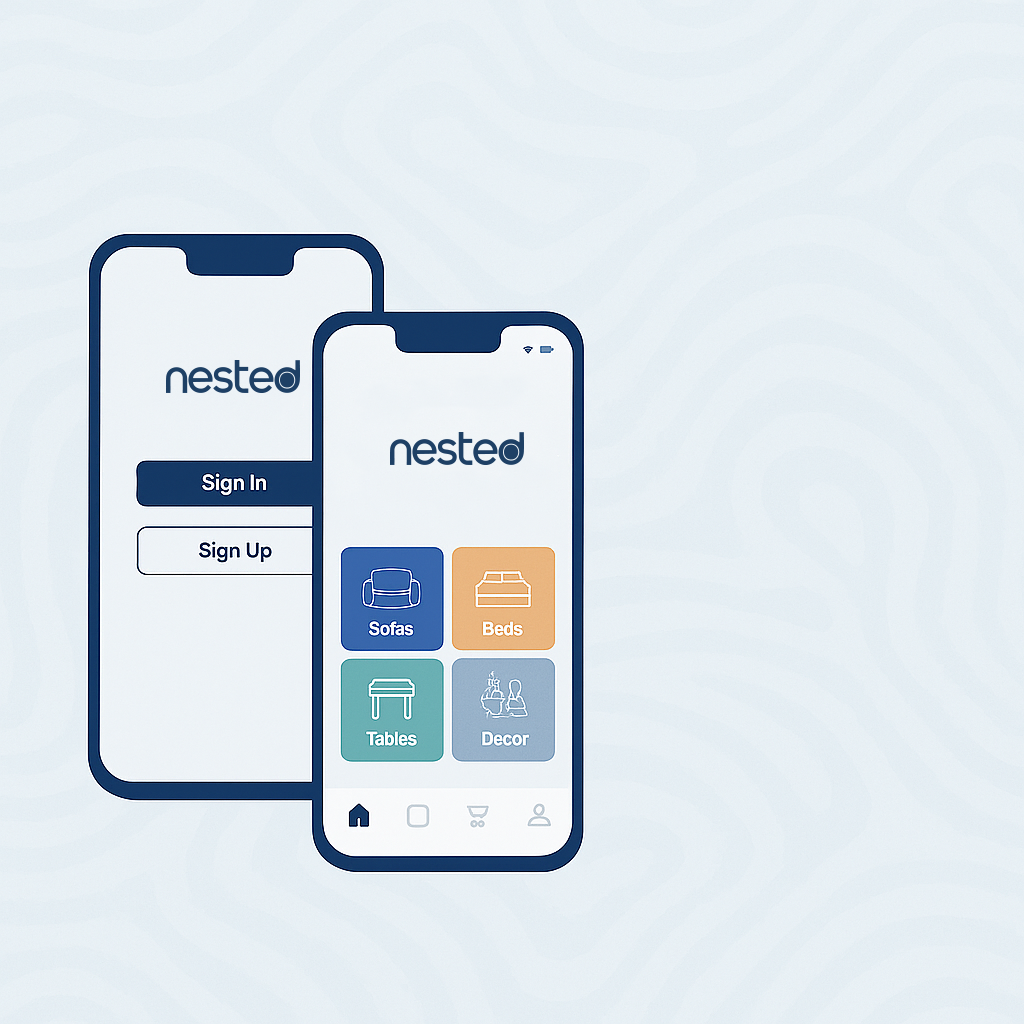
✅ Step 1: Open the App
Tap on the Nested.pk icon to open the app.
A loading screen will appear for a few seconds.
You’ll then see the main home screen.
👤 Step 2: Sign In or Sign Up
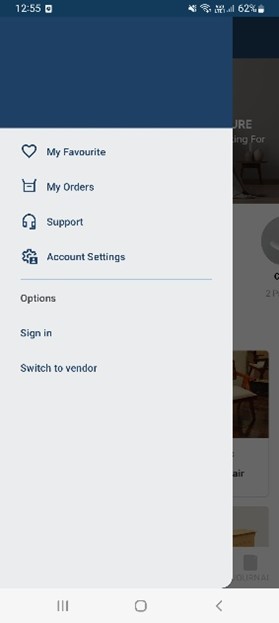
At the bottom of the screen, tap on the “Account” icon.
A menu will appear from the left.
Tap on “Sign” to go to the login or registration screen.
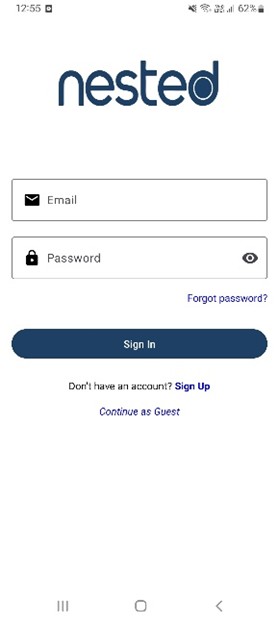
🔓 Step 3: Already Have an Account?
You’ll see the Sign In screen.
Type in your email and password.
Tap the Login button.
💡 If you don’t have an account, tap “Sign Up” at the bottom of the screen.
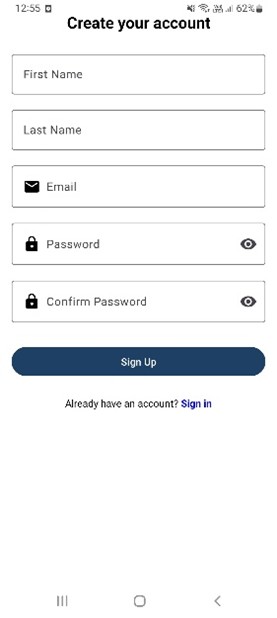
📝 Step 4: New to Nested.pk? Create an Account
On the Sign Up screen, fill in the following:
Your First Name
Your Last Name
Your Email Address
Create a Password (minimum 8 letters or numbers)
Confirm your password
Then tap Sign Up.
💡 Already registered? Tap on “Sign In” to go back.
🏠 Step 5: After Signing In
Once you log in or sign up, you’ll be taken back to the Home screen — now logged in.
📱 Step 6: Access the Menu Anytime
Whenever you want to:
Check your profile
Become a vendor
View orders
Just tap the “Account” icon at the bottom of the app.
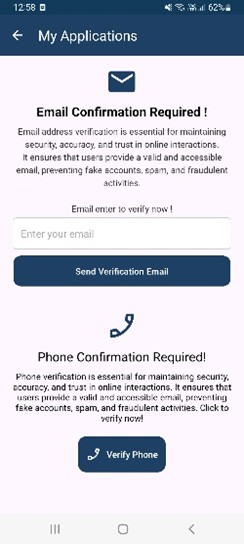
📧 2. Email Verification – Quick and Easy
After signing up, we will verify your email address. This helps protect your account.
Here’s What Happens:
A 6-digit code (OTP) will be sent to your email.
Open the email and copy the code.
Enter the code in the app when asked.
You’ll get a confirmation that your email is verified.
💡 Didn’t get the code? Check your Spam or Junk email folders. You can also tap “Resend OTP” in the app.
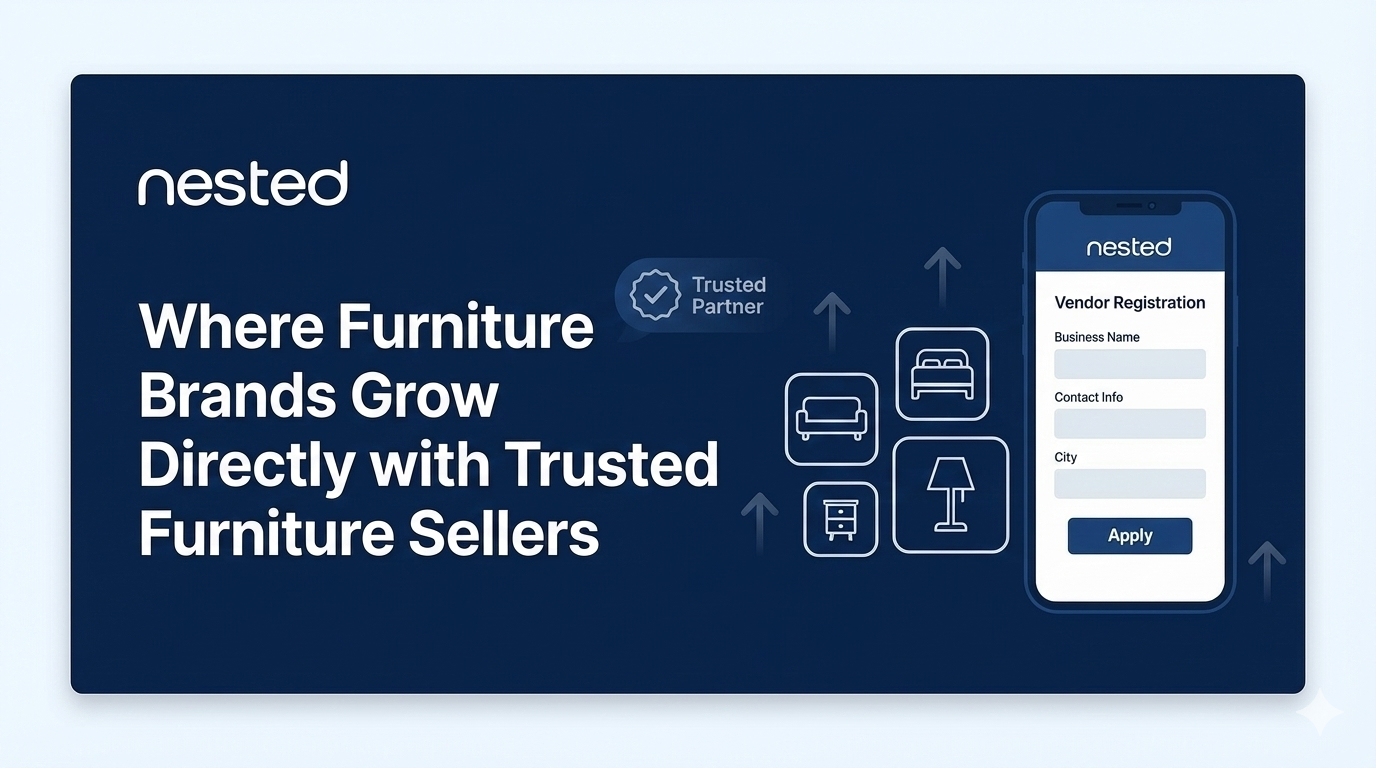
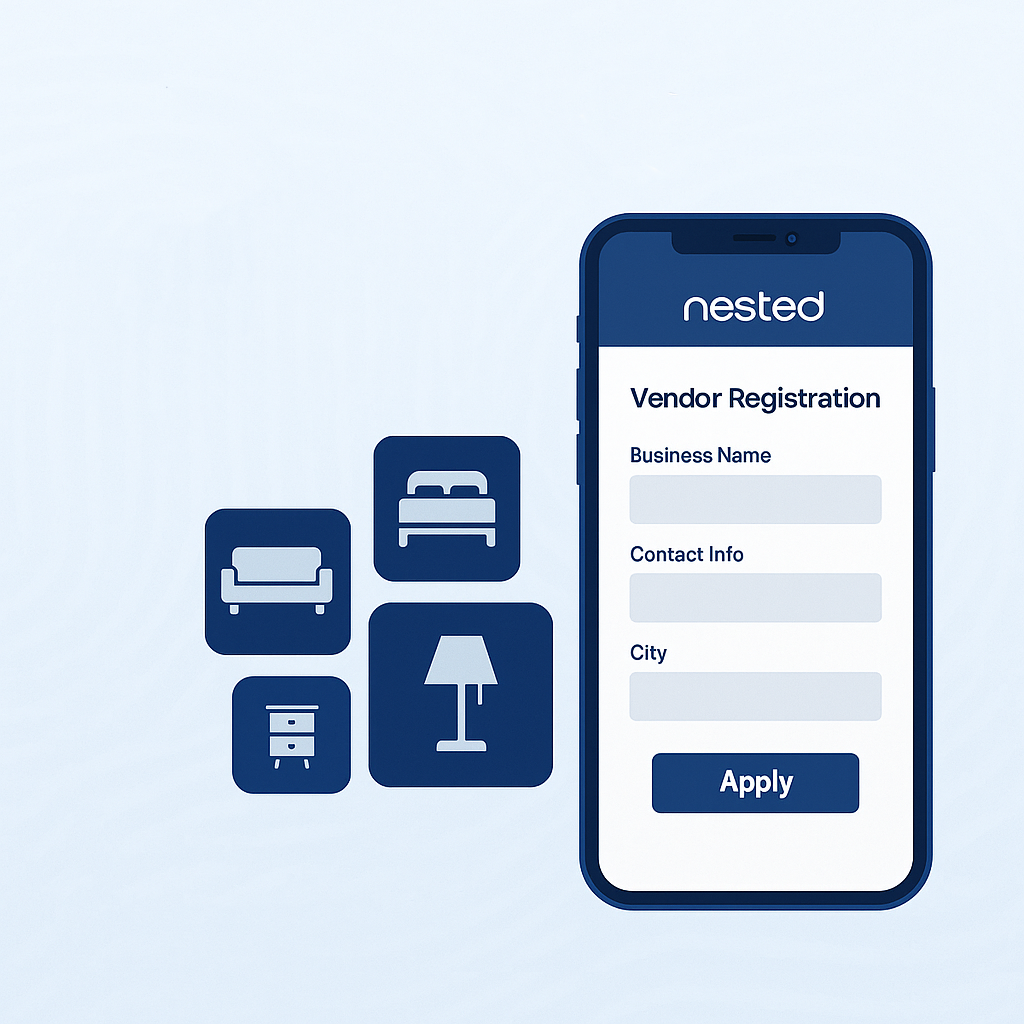
🏪 3. How to Become a Vendor
Once your email is verified, you can apply to become a vendor and start selling on Nested.pk.
✅ Step 1: Start the Vendor Application
Tap the “Account” icon at the bottom.
Select “Become a Vendor” from the menu.
Choose your vendor type:
Individual (if you’re selling personally)
Company (if you’re selling as a registered business)
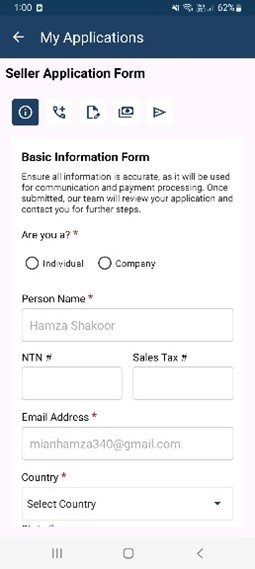
🧾 4. Fill Out the Vendor Application
The application has 5 simple sections. Fill them one by one.
1️ Basic Information
You’ll be asked to enter:
Your business name
Type of business (Individual or Company)
Address of your business
Phone number where we can reach you
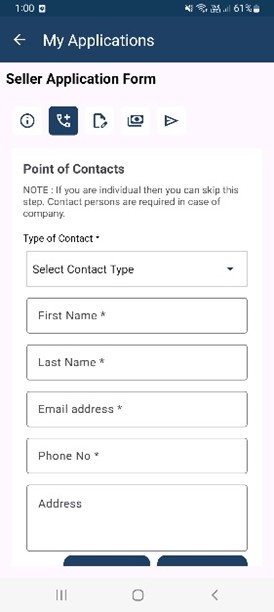
2️ Contact Persons
Add the names and mobile numbers of people we can contact for business or support matters.
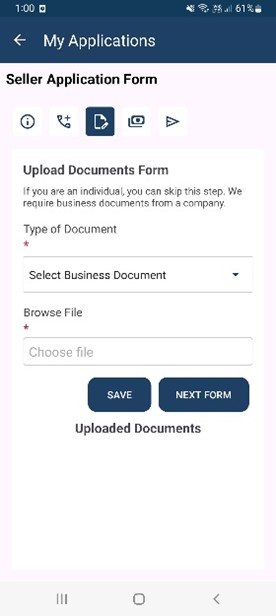
3️ Upload Documents
Depending on your vendor type, upload the following:
For Individual Vendors: A clear photo of your CNIC or ID card.
For Company Vendors:
Business registration certificate
Tax documents or any license, if available
4️ Bank Information
Add your bank account details, such as:
Account holder name
Bank name
Account number This is the account where you will receive your payments from product sales.
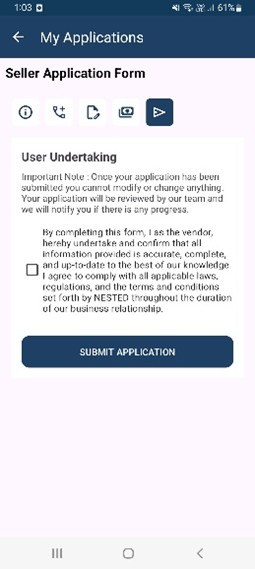
5️ Submit Your Application
Once everything is filled, tap Submit.
You’ll see a confirmation message: 🟢 “Your application has been submitted. Our team will review it soon.”
📥 5. What Happens After You Apply?
Once your vendor application is submitted:
Our team will check your details and documents.
If all looks good, your account will be approved.
You’ll get a message in the app or an email once approved.
🕐 Review Time: Usually 1 to 3 working days
🛍️ 6. How to Add Products (After Approval)
Once your vendor account is approved, you can start adding products to your shop.
Here’s how to do it — in 5 simple steps:
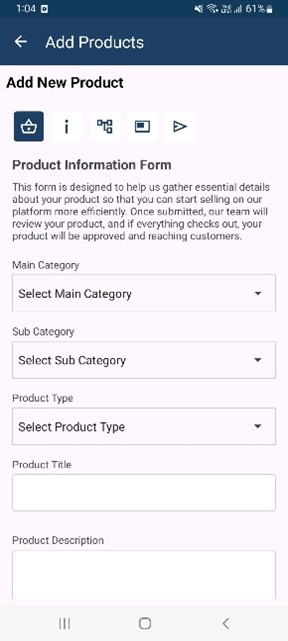
📦 1️ Product Information
Add the name of your product, choose the correct category, and write a short description (what the product is, who it’s for, etc.)
Then tap Next.
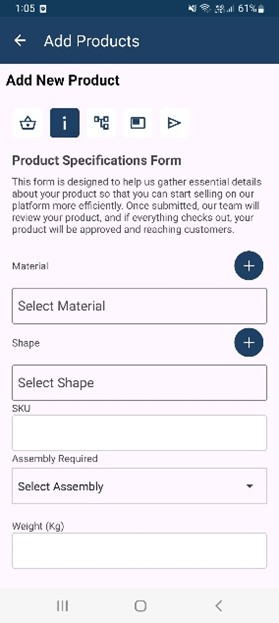
2️ More Product Details
Now add extra details to help buyers understand the product better:
Size and weight
Available colors or styles
What material it’s made of
Washing or care instructions
Warranty (if any)
Tap Next to continue.
🎨 3️ Product Variants
If your product has different versions (like sizes or colors), add each one.
For example: 👕 T-shirt in Small, Medium, Large 👟 Shoes in different colors
Also:
Upload at least one photo for each version
Choose one main photo that shows the product clearly
💡 Good photos help buyers trust your product and increase sales!
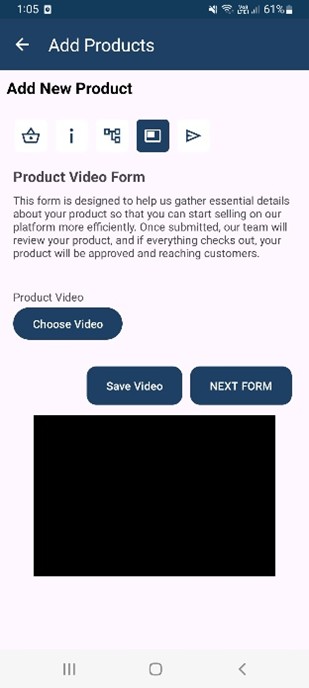
🎥 4️ Add a Product Video (Optional)
You can upload a short video showing the product:
How it looks from different angles
How to use it
Special features
Tap Next when done.
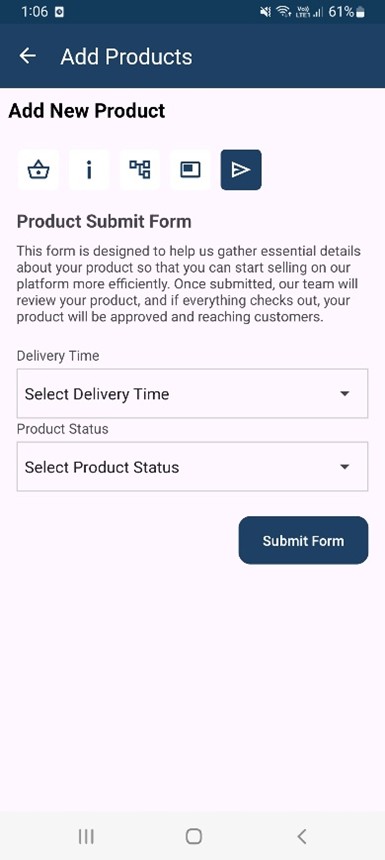
✅ 5️ Final Check & Submit
Look over everything you added.
Then choose:
Save as Draft (if you want to come back later), or
Submit for Review (so our team can approve and publish it)
🔔 After You Submit a Product
Our team will review your product.
If everything is complete and clear, it will be approved and published in the app.
You’ll get a notification when it goes live.
🛎️ Support and Troubleshooting
If you ever need help:
Contact our Customer Service Team directly.
Visit our Support Page.
Explore the FAQs.
Why Choose Nested.pk?
Unlike OLX or Daraz, Nested.pk focuses only on furniture. Vendors enjoy:
Free registration — no upfront cost to join.
Low commission rates , which are fair and competitive.
Specialized buyer traffic — people using Nested.pk are actively looking for furniture, not general items.
This makes it one of the best choices for furniture e-commerce in Pakistan.
FAQs
Q1. Is the Nested.pk app free? Yes, it’s free for both buyers and vendors.
Q2. Do vendors pay commissions? Yes. Nested.pk charges a low commission per sale. This is more affordable than many other platforms, and since there are no registration fees, vendors only pay when they earn..
Q3. Can I sell from any city? Yes, vendors from Lahore, Karachi, Faisalabad, and all over Pakistan can sell.
Q4. How do I get paid? Payments go directly into your bank account.
Q5. Can individuals also sell? Yes — both individuals and companies can apply as vendors.
Conclusion: Start Selling Today
With the Nested.pk Mobile App, you can:
Create your account
Verify your email
Apply as a vendor
List your first product
Grow your business
👉 Download the app now and start your journey with Pakistan’s trusted online furniture marketplace.